No one likes to admit this time of the season is actually here, but if you’re an inhabitant of the northern climates the time has come to think about storing your personal watercraft for the winter. A few simple, yet critical, winterization steps will have your prized watercraft ready to go when spring rolls around.
Even if you are fortunate enough to live in warm weather climates year-round, these tips are just as useful for long-term storage of your watercraft to ensure you get the most out of every ride.
Winterizing your watercraft is imperative to ensuring it performs up to its capabilities each season. Failure to perform the proper preventative maintenance for long-term storage – wherever you’re storing your watercraft – can have costly consequences. Gummed-up fuel systems, battery failure and damage to vital internal parts are just a few of the things that can go wrong if proper care is not taken. If you’re in an area where temps dip below freezing, complete winterization is a must!
Many individuals can perform the following winterization steps from the comfort of their own garage with a few simple tools. However, if you have any questions or are uncomfortable performing any of the following tasks, don’t hesitate to reach out to a qualified service technician for advice or assistance.
The following steps should be performed in the order outlined here.
Clean and Inspect jet pump
A quick visual inspection of the jet pump intake and outlet is all that’s needed here. Make sure there are no cracks or other visible signs of excessive wear. If there are, talk to your dealer about replacement. Spraying water on both can help remove any debris that may remain from your last ride. Applying a coat of anti-corrosive lubricant to each area is a good idea for long-term storage.
A jet pump that’s been contaminated with water can mean other problems are present and a trip to your dealer may be in order. To inspect the jet pump, remove the impeller cover to verify no water has collected.
Stabilize the fuel system
Adding XPS fuel stabilizer will ensure your fuel, and fuel system remain in good condition over the course of long-term storage. It prevents build up within the entire fuel delivery system. Add stabilizer per the instructions on the container. Fill fuel tank completely with fresh fuel. This is also the perfect time to check over the fuel delivery system for leaks. If you see or smell fuel, consult your dealer.
Replace engine oil and filter
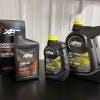
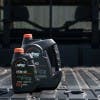
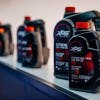
A fresh oil change and oil filter is recommended to again ensure that your watercraft will be ready to go as soon as you unwrap it for spring. An XPS Oil Change Kit will give you everything you need to get the job done in one box, including XPS synthetic blend oil, oil filter and O-rings.
Flush and drain exhaust system
It’s important to get any contaminants out of watercraft exhaust system, especially if you typically ride in a saltwater environment (then flushing is strongly recommended after every ride).
To flush the exhaust system, hook a garden hose up to the connector located at the rear (port side of the stern) of the watercraft. DO NOT OPEN WATER TAP YET! Start the watercraft engine and then immediately open the water tap. Run the engine for 90 seconds at idle and ensure water flows out of the pump while flushing. Next, shut the water off and continue to run the engine at 5000 RPM for 5 seconds, then shut the engine down.
Drying out the exhaust system is especially critical in cold weather areas. Freezing water in the exhaust system can cause extensive damage to the exhaust manifold. In order to complete drain the system, blow compressed air at 55 PSI (379 kPa) into the flushing connector the hose was attached to until no water flows out of the jet pump. This will ensure all water has been removed from the watercraft’s exhaust system.
Internal Engine Lubrication (Fogging)
Here’s where things vary a bit depending on your model. Once you have access to the engine, remove the ignition coils and spark plugs. Spray XPS Anti-Corrosive Lubricant into the spark plug holes.
Next you’ll want to crank the engine. To do this, fully depress the throttle lever and hold it against the handlebar. This will disable fuel delivery and ignition during engine cranking. While you hold the throttle, press the start/stop button to crank the engine a few times. This will help distribute the anti-corrosive lubricant to the cylinder walls.
Finally, apply a small amount of anti-seize lubricant to your spark plug threads and reinstall them and the ignition coils.
Battery Care
As you prepare your watercraft for hibernation, pay special attention to your battery. Your battery is where it all starts (or doesn’t start) and batteries can and do lose their ability to maintain a charge over time and proper battery storage is essential.
Your watercraft battery should be removed from your watercraft to ensure no draw of any kind is made on the battery during months of non-use. Ensure the battery is place on a secure surface in an open-air location away from any flammable substances. If the battery is not showing a full charge after a day or two on the charger, ensure all connections are solid and if the battery still does not charge, it is time to replace the battery.
Hull and Body Cleaning
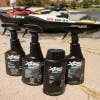
With all the mechanical maintenance complete, it’s time to give your watercraft a good scrubbing to make sure it’s looking pristine when you take it out for your first ride next season. Depending on your model, you’ll want to use the appropriate XPS Care products to wash your watercraft. XPS products are specially engineered to remove grime and water stains. Take care to remove any marine organisms as well.
You’re now ready to store your watercraft. If you plan on storing it outside, cover it with an opaque, breathable tarp or cover. This will protect your watercraft from damaging sun rays and keep it dust and grime free for next season. Do not wrap it in plastic or other non-breathable material as it may cause mold in certain areas of the watercraft.
We know nobody looks forward to putting their watercraft in hibernation but if you follow the above recommendations, come spring you will be on the water trouble free.


